Quick Answer
The best way to brush a dog is to choose a brush that matches the coat, check for mats first, and work gently in small sections. Brush in the direction the coat grows, reach the undercoat when needed, and never force a brush through a painful knot. For a more detailed coat-by-coat method, see our step-by-step dog brushing guide.
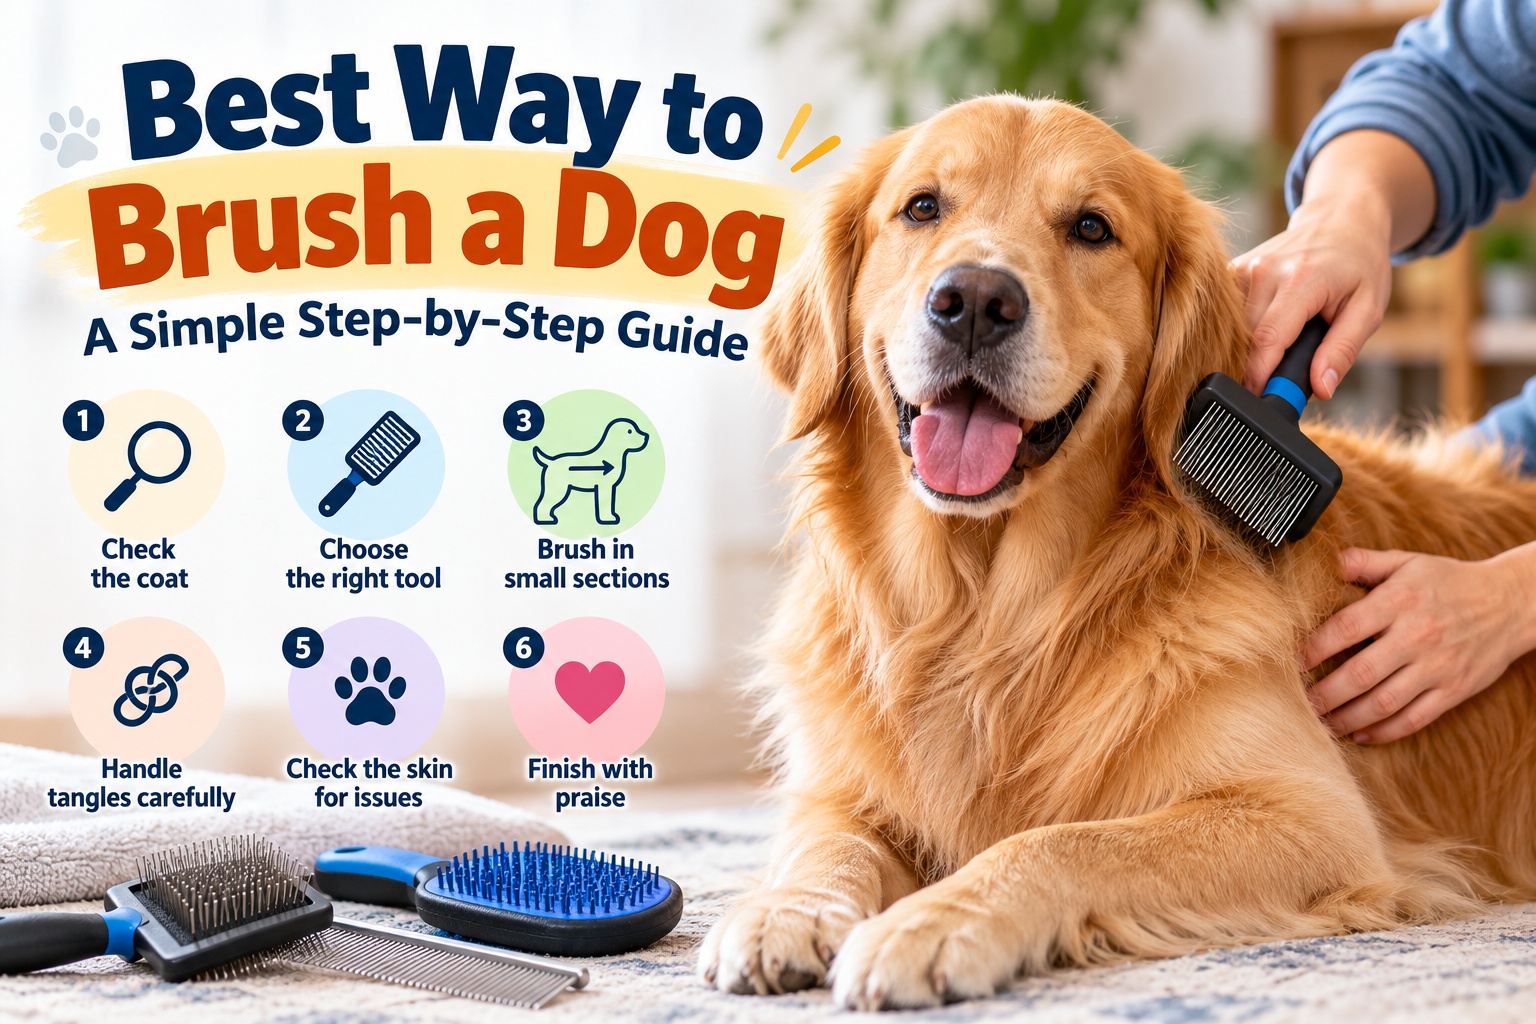
Best Way to Brush a Dog in 6 Steps
- Check the coat: Look for mats, sores, burrs, ticks, redness, and tender areas before brushing.
- Choose the tool: Match your brush or comb to the dog’s coat length, texture, and density.
- Start gently: Use light strokes on an easy area such as the shoulders or back.
- Work in sections: Brush the back, sides, chest, legs, belly, and tail instead of rushing over the surface.
- Handle tangles carefully: Support the hair near the skin and loosen small knots from their ends.
- Finish positively: Check the skin again and reward calm behavior.
Brushing a dog looks simple until the brush catches a knot or disappears into a thick undercoat. The technique matters just as much as the tool.
I prefer a slow, section-by-section routine. It keeps grooming comfortable while giving me time to notice changes in the coat and skin.
What Is the Best Way to Brush a Dog?
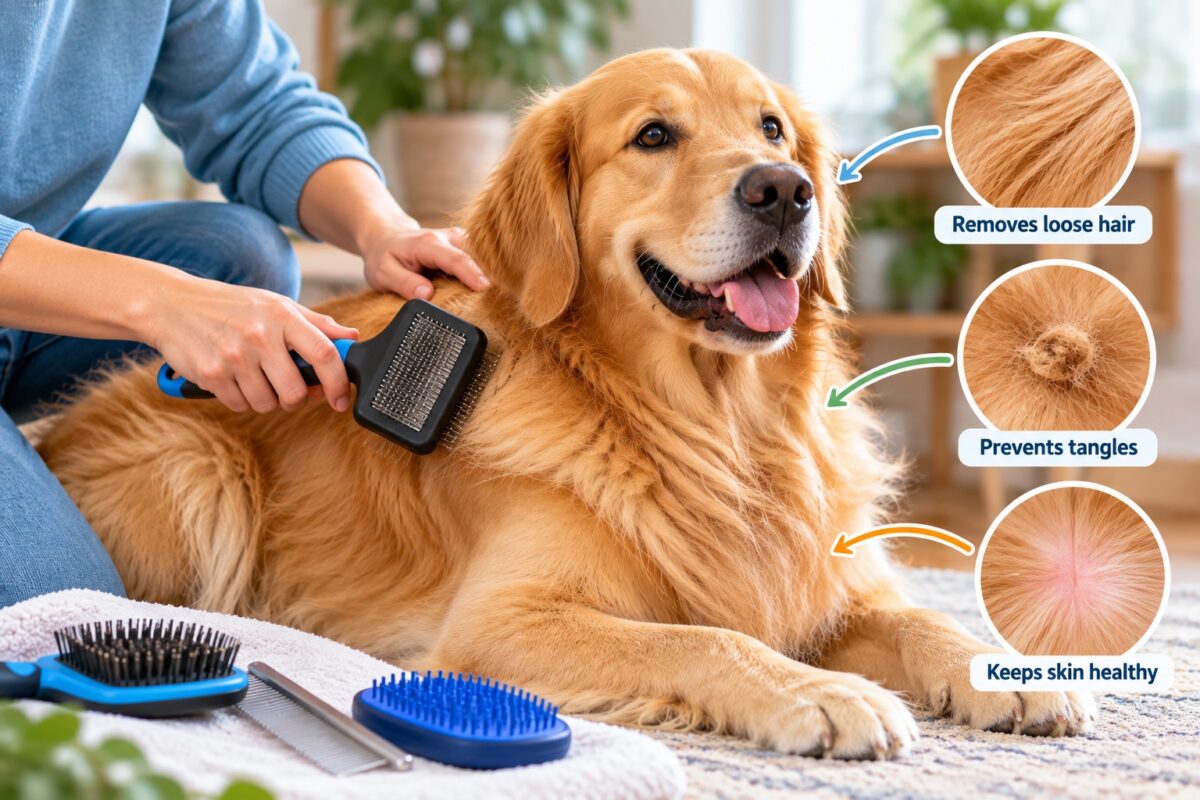
The best brushing method is to match the tool to the coat and use gentle, controlled strokes. You want to remove loose hair and tangles without repeatedly scraping the skin.
Dog brushing is routine coat care using a brush, comb, rake, or grooming glove to remove loose hair, dirt, debris, and manageable tangles.
- Remove loose fur: Collect shedding hair before it reaches your furniture and floors.
- Prevent tangles: Catch small knots before they become tight mats.
- Clear debris: Remove grass, dust, burrs, and surface dirt.
- Inspect the skin: Look for redness, sores, parasites, lumps, or tender areas.
- Build handling tolerance: Regular calm grooming helps many dogs accept being touched more comfortably.
The American Kennel Club’s grooming guidance also recommends choosing grooming tools according to coat type and using regular brushing to manage loose hair and debris.
How Do You Brush a Dog Step by Step?
Start with a dry coat unless a professional or product instruction specifically tells you otherwise. Take your time and stop if your dog shows pain.
- Let your dog settle. Choose a quiet, non-slip area and keep treats nearby if they help your dog relax.
- Inspect the coat with your hands. Feel for knots, mats, burrs, sensitive spots, cuts, or anything unusual.
- Choose the right brush. A rubber grooming tool, bristle brush, slicker, pin brush, comb, or undercoat tool may be appropriate depending on the coat.
- Start on an easy area. The shoulders and back are often easier than paws, belly, tail, or ears.
- Brush with light pressure. Let the pins or bristles travel through the coat without digging into the skin.
- Work in small sections. Move systematically so you don’t repeatedly brush the same patch.
- Check deeper layers. Long and double coats need more than a quick surface pass.
- Deal with small tangles carefully. Hold hair near the skin to reduce pulling and work from the outer end of the knot inward.
- Finish with a comb when appropriate. A comb can reveal small tangles a brush missed in longer coats.
- Reward calm behavior. Finish before your dog becomes frustrated.
One of my most useful rules is simple: more pressure doesn’t mean better grooming. If a brush keeps catching, I stop and find out why.
Which Dog Brush Should You Use for Each Coat Type?
The ideal tool depends on the coat’s length, density, texture, and shedding pattern. No single brush works equally well for every dog.
The AKC’s dog brush guide describes slicker, bristle, rubber, and undercoat tools for different coat types.
| Coat Type | Useful Tool | Main Goal | Important Tip |
|---|---|---|---|
| Short, smooth | Rubber curry or bristle brush | Lift loose surface hair and dirt | Use light pressure |
| Medium | Slicker or pin brush plus comb | Remove loose fur and prevent tangles | Check behind ears and legs |
| Long | Pin or slicker brush plus comb | Separate hair and prevent matting | Work in small layers |
| Curly | Slicker brush plus metal comb | Find hidden tangles near the skin | Comb-check after brushing |
| Double coat | Slicker or suitable undercoat tool | Reach loose undercoat | Don’t groom only the topcoat |
For a dense two-layer coat, our double-coated dog grooming guide explains why the undercoat needs special attention before and after bathing.
Should You Brush With or Against the Direction of Hair Growth?
For routine brushing, I usually begin in the natural direction of hair growth. It tends to feel comfortable and makes it easier to judge how much pressure I’m using.
Some short-coated grooming routines use a gentle pass against the coat to loosen dead hair before smoothing it back down. This isn’t necessary for every dog.
- Long coats: Work in sections and separate layers rather than aggressively brushing backward.
- Curly coats: Concentrate on reaching the base of the coat without scratching the skin.
- Double coats: Reach the undercoat with a suitable tool instead of repeatedly brushing the surface.
- Short coats: Rubber grooming tools can loosen dead hair with gentle movement.
Watch your dog’s response. Flinching, turning toward the brush, suddenly moving away, or becoming defensive can mean the pressure or technique needs to change.
How Should You Remove Tangles and Mats?
Small tangles can often be loosened patiently, but tight or skin-level mats are different. Never force a brush through a painful mat.
Support the hair near the skin with your fingers. Then begin at the outer edge of a small tangle and loosen a little at a time.
- Don’t yank: Pulling the hair also pulls the skin beneath it.
- Don’t keep scraping: Repeated strokes over one patch can irritate the skin.
- Don’t blindly cut mats: Dog skin can become pulled into a tight mat where it’s difficult to see.
- Get professional help: Severe matting, pain, wounds, or skin-tight knots deserve help from a groomer or veterinarian.
Long-haired dogs deserve an especially careful pre-bath check. Our guide to bathing a long-haired dog without tangles explains the brushing and washing order.
How Often Should You Brush Your Dog?
There isn’t one correct schedule for every dog. Coat type, shedding, activity, and tendency to mat all affect brushing frequency.
As of 2026, major grooming guidance continues to emphasize adjusting the routine to the individual dog’s coat rather than following one universal schedule.
- Short, smooth coats: Many can be maintained with regular light brushing, often around weekly or several times per week during shedding.
- Medium coats: Check several times per week and increase brushing if tangles or loose hair build quickly.
- Long coats: Frequent checking is important because knots can form behind ears, under legs, and around friction areas.
- Curly coats: Regular brushing and combing helps catch knots before they tighten near the skin.
- Double coats: Extra grooming may be useful when seasonal shedding releases more undercoat.
Your dog’s coat gives useful feedback. If tangles or packed loose fur develop between sessions, shorten the interval.
Should You Brush a Dog Before or After a Bath?
For most dogs, brush before bathing to remove loose hair, debris, and manageable tangles. A gentle finishing brush can also help after the coat is properly dried.
Brushing first gives you a chance to discover knots before water complicates the grooming process.
- Inspect the dry coat.
- Brush out loose hair and manageable tangles.
- Bathe with a dog-appropriate shampoo.
- Rinse thoroughly.
- Dry according to the coat type.
- Finish with a gentle brush or comb if appropriate.
See our complete explanation of brushing a dog before or after a bath for the full grooming sequence.
What Areas Are Most Commonly Missed While Brushing?
The back is easy to reach, so it often gets most of the attention. Hidden friction areas are where I slow down.
- Behind the ears: Fine hair can knot quickly.
- Under the front legs: Movement and friction can encourage tangles.
- Chest: Thick or feathered coats can hide loose hair.
- Belly: Use light pressure because the skin may be sensitive.
- Rear legs: Feathering can knot in long-coated dogs.
- Tail: Support long hair rather than pulling from the root.
- Collar and harness areas: Repeated rubbing can encourage knots.
I like to use my fingertips before the brush reaches these areas. Feeling a knot first helps prevent an unexpected pull.
What Should You Do If Your Dog Hates Being Brushed?
Don’t try to finish the entire coat in one session. Short, positive sessions can be more useful than forcing a frightened dog through a long grooming routine.
The AKC’s guidance on dogs that dislike brushing recommends introducing grooming gradually and rewarding calm behavior.
- Introduce the tool: Let your dog calmly investigate the brush.
- Start somewhere easy: Choose a body area your dog already tolerates being touched.
- Use only a few strokes: Stop while the dog is still calm.
- Reward cooperation: Use praise or a suitable treat.
- Build slowly: Add new areas over multiple sessions.
Pain can also make a previously tolerant dog resist brushing. Sudden sensitivity deserves attention, especially when you notice sores, skin changes, swelling, or severe matting.
What Dog Brushing Mistakes Should You Avoid?
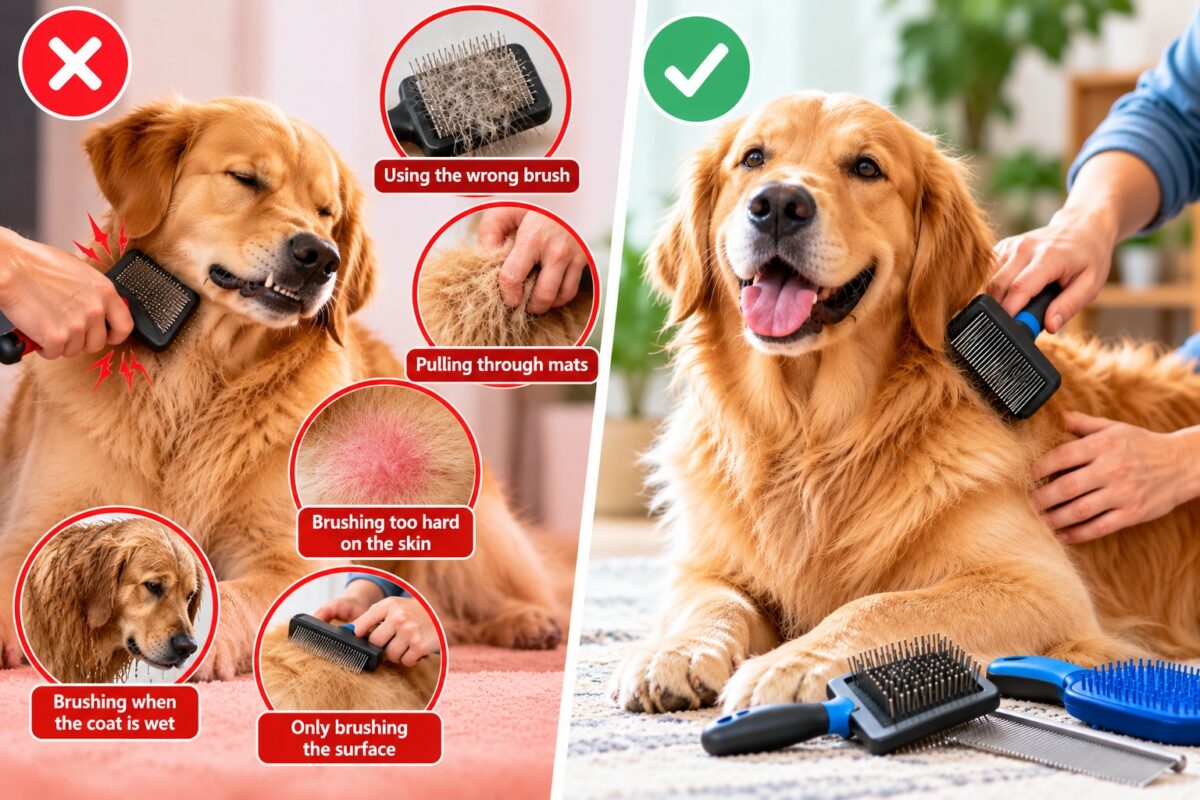
Most brushing problems come from using the wrong tool, too much pressure, or trying to finish too quickly.
- Using one brush for every coat: A tool that works on a Labrador may not suit a Poodle or Collie.
- Only brushing the surface: Dense coats can hide loose undercoat and knots underneath.
- Pulling through mats: This can make grooming painful.
- Brushing irritated skin: Repeated friction can worsen discomfort.
- Ignoring sensitive areas: Ears, armpits, belly, paws, and tail need slower handling.
- Making sessions too long: End while your dog can still cooperate calmly.
A grooming session should leave the coat more manageable without leaving the skin red or your dog afraid of the next session.
Dog Brushes I Would Consider for Home Grooming
You don’t need a drawer full of grooming tools. I would choose one or two that match the coat and use them correctly.
🏆 Best Everyday Slicker
Hertzko Self-Cleaning Slicker Brush
★★★★½
Fine bent pins help collect loose hair and work through many medium-length coats, while the retractable design simplifies cleanup. I like this style for routine sessions where convenience matters as much as hair removal.
🐕 Best for Heavy Shedding
FURminator deShedding Tool
★★★★☆
The stainless deShedding edge is designed to reach loose undercoat beneath the topcoat. I would reserve this type of tool for an appropriate shedding coat rather than treating it as a universal everyday brush.
✨ Best Two-in-One Option
Safari Pin & Bristle Brush
★★★★☆
The pin side can help with longer hair while the bristle side provides a lighter finishing pass. I like combination brushes when an owner wants a simple tool for basic maintenance rather than aggressive deShedding.
Frequently Asked Questions
What is the best direction to brush a dog?
For routine grooming, start by brushing in the natural direction of hair growth with gentle pressure. Long, curly, and double coats may require sectioning to reach deeper layers. Avoid repeatedly dragging a brush backward against the skin if your dog appears uncomfortable.
How long should you brush a dog?
There is no required session length. Brush long enough to cover the coat comfortably without making your dog frustrated. A short five-minute session can be better than a long struggle, especially for puppies or dogs that are still learning to accept grooming.
Can you brush a dog too much?
Yes. Repeated hard brushing over the same area can irritate skin and damage hair. Stop when loose hair decreases, the coat is manageable, or your dog becomes uncomfortable. The correct amount depends on coat type, tool, pressure, and shedding level.
Should I brush my dog when the coat is wet or dry?
Routine detangling is generally easier to assess on a dry coat. Brush out loose fur and manageable tangles before bathing. Some coat types may also be brushed during controlled drying, but you should never force a brush through a tight wet knot.
What should I do if brushing hurts my dog?
Stop and inspect the area instead of brushing harder. Look for mats, sores, wounds, skin irritation, swelling, parasites, or another source of pain. Severe matting or unexplained sensitivity may require help from a professional groomer or veterinarian.
What Is the Best Dog Brushing Routine?
The best way to brush a dog is calm, systematic, and tailored to the coat. Choose the correct tool, inspect the skin, work in sections, and use only enough pressure to move through the hair comfortably.
Don’t measure a successful grooming session by how much fur you remove. Measure it by whether the coat is manageable, the skin looks comfortable, and your dog can finish the session without unnecessary stress.
One thing to do today: run your fingers behind your dog’s ears and under the front legs. Those hidden areas can tell you quickly whether it’s time for a proper brushing session.