Quick Answer
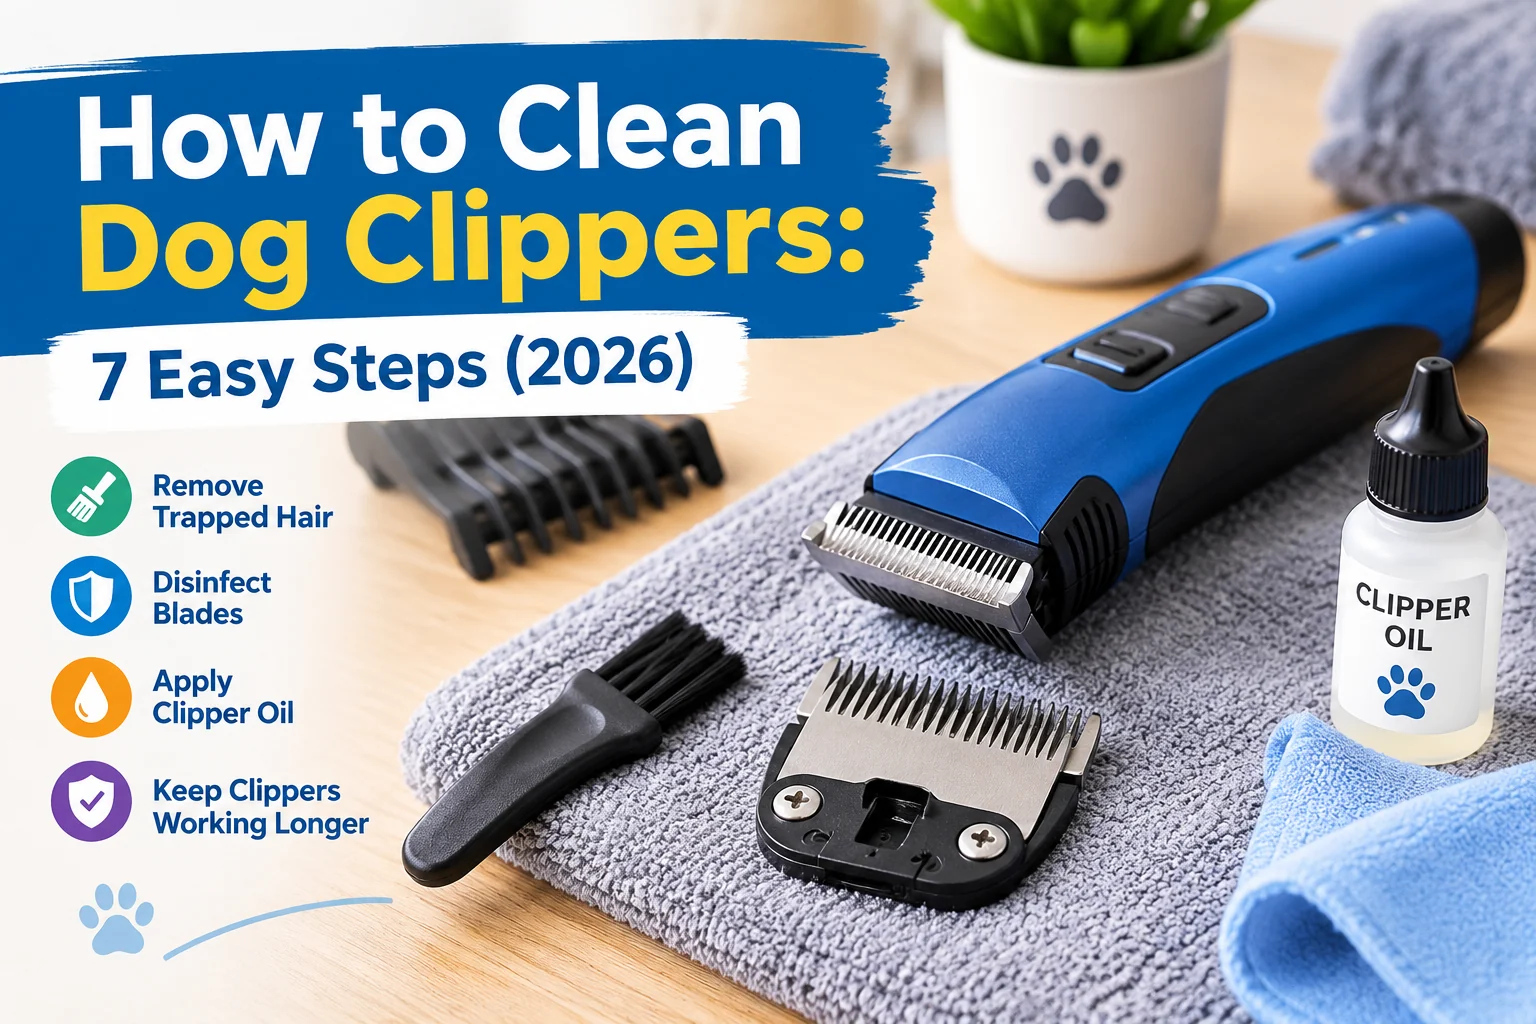
To clean dog clippers, switch them off and unplug them, remove detachable guards and blades, and brush away trapped hair. Clean the blades with a manufacturer-approved product, disinfect when appropriate, dry thoroughly, and apply a small amount of clipper oil. Wipe the clipper housing and store everything in a dry place. Never immerse the electrical body in water.
Dog clippers collect loose fur, skin flakes, dust, and grooming-product residue. Over time, this buildup can clog the cutting teeth, increase friction, and make grooming less comfortable for your dog.
Fortunately, routine cleaning is straightforward. The main challenge is knowing which parts can get wet, which cleaning products are suitable, and how to oil the blades without leaving a sticky residue.
This guide explains a practical seven-step cleaning routine for home dog grooming, including the important differences between cleaning, disinfecting, and lubricating.
What Do You Need to Clean Dog Clippers?
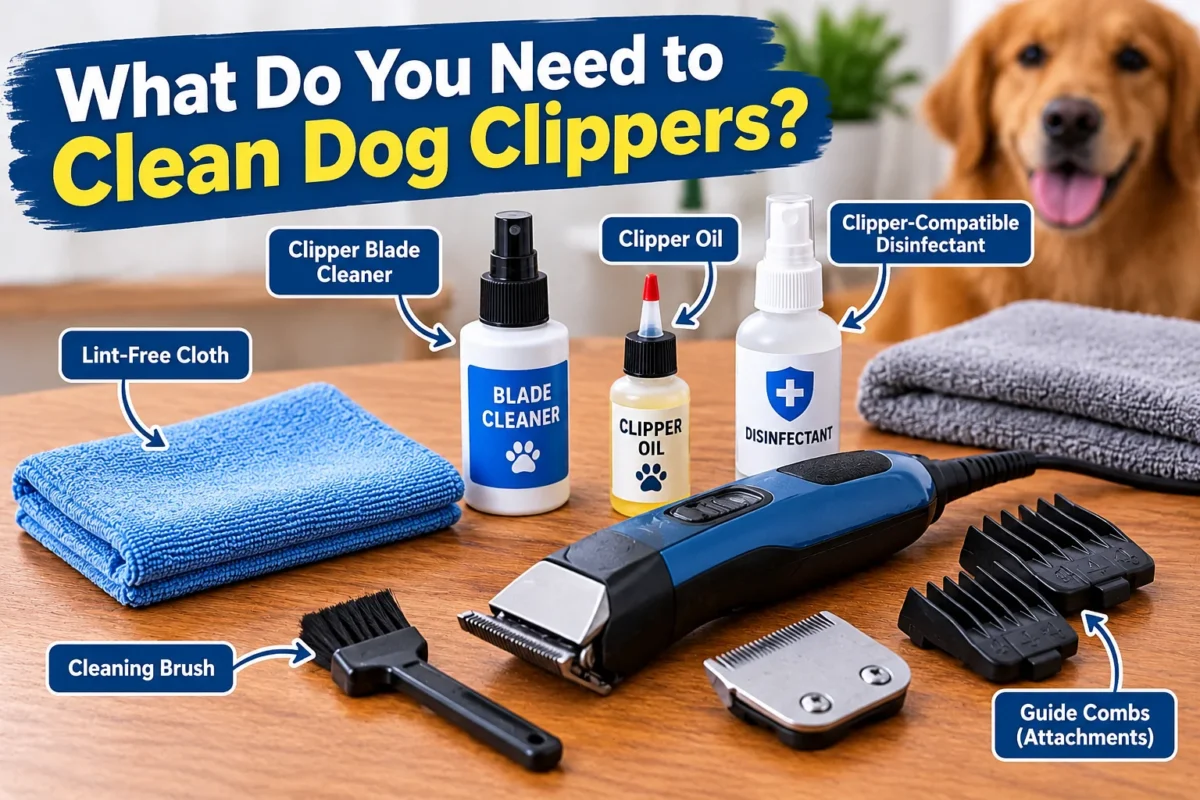
You need a soft cleaning brush, a lint-free cloth, suitable blade cleaner, and clipper oil. Depending on your equipment, you may also need a clipper-compatible disinfectant.
Prepare these supplies before starting:
- Small blade brush: Removes hair trapped between the cutting teeth and around the blade assembly.
- Lint-free cloth: Wipes residue from accessible surfaces without leaving fibers behind.
- Clipper blade cleaner: Helps remove oily residue and buildup when dry brushing is insufficient.
- Clipper-compatible disinfectant: Used when sanitizing blades is necessary, particularly between different animals.
- Clipper oil: Lubricates metal cutting surfaces and helps protect them against corrosion.
- Clean, dry workspace: Keeps loose parts organized and away from water.
Use products compatible with your particular clipper and blade materials. A cleaner suitable for a removable steel blade may not be appropriate for a fixed ceramic cutting head or the electrical housing.
A dry soft toothbrush can sometimes substitute for the supplied cleaning brush. Avoid abrasive scrubbing tools that could damage the cutting surfaces.
How to Clean Dog Clippers in 7 Easy Steps
The safest cleaning order is to disconnect power, remove accessible attachments, clear hair, clean the blades, disinfect if necessary, dry and lubricate, and finally store the equipment.
Turn Off and Unplug the ClippersSwitch the clipper off before touching its blade assembly. Disconnect corded clippers from the power outlet and remove cordless models from their charging equipment.
If the blade is hot after grooming, allow it to cool before handling it. Work on a stable surface where small attachments cannot fall.
Never spray liquid into a powered clipper or try to remove a detachable blade while its motor is operating.
Remove Guards and Detachable BladesTake off the guide combs or guards. If your clipper has a detachable blade, release it according to the manufacturer’s instructions.
Some clippers use snap-on blade systems; others have fixed blades or assemblies secured with screws. Do not force a blade off or loosen screws unless the manual specifically describes that maintenance procedure.
Place removable parts on a clean cloth. Keep track of their orientation so they can be reattached correctly.
Brush Away Loose Hair and DebrisUse the cleaning brush to gently remove fur from the blade teeth, grooves, and accessible spaces around the cutting head.
Pay special attention to the area behind the blade teeth, where short hairs can become tightly packed. Brush in a controlled direction rather than pushing hair deeper into the assembly.
Also clear hair from the guide combs and accessible exterior openings. Do not insert sharp objects into the motor housing or disturb internal wiring.
This dry-cleaning step is valuable even when you plan to use a liquid blade cleaner afterward.
Clean the Clipper BladesAfter removing loose hair, use a blade cleaner recommended for your equipment. Apply it according to the cleaner’s label and the blade manufacturer’s instructions.
Some removable metal blades can be cleaned using an approved blade-wash solution. Other blade systems require spraying or wiping instead.
Only immerse a detached blade when its manufacturer explicitly permits immersion. Never assume that an entire clipper or fixed cutting head is waterproof.
Wipe away loosened residue with a lint-free cloth. If the blade still contains hair, repeat gentle brushing after following the cleaner’s directions.
Disinfect the Blades When NecessaryCleaning and disinfecting serve different purposes. Cleaning removes visible debris, while disinfecting uses a compatible product to reduce microorganisms on treated surfaces.
For blades shared between dogs, apply an appropriate clipper disinfectant according to the product label. Follow its required surface wet-contact time, rinsing instructions if applicable, and safety precautions.
Do not assume every cooling spray or blade wash is a disinfectant. Use only products with a disinfecting claim and directions suitable for the blade.
When infection or a contagious skin condition is suspected, follow veterinary guidance and avoid sharing equipment until it can be safely disinfected.
Dry and Oil the BladesRemove moisture and residual cleaner as directed, then let the blade dry completely. Pay attention to areas where liquid might remain trapped.
Apply a small amount of manufacturer-recommended clipper oil at the specified cutting surfaces or contact points.
When instructed by the clipper manual, reinstall the blade, briefly run the clipper to distribute the oil, switch it off, and wipe away visible excess.
Too much oil can collect hair and dirt, creating another source of buildup. Never apply lubricant directly into electrical openings.
Clean the Housing and Store EverythingWipe the clipper’s exterior with a dry cloth or a slightly damp cloth if the manufacturer permits it. Keep moisture away from charging ports, switches, ventilation openings, and exposed electrical connections.
Clean guide combs separately according to their material and care instructions, then dry them before storage.
Inspect the blade teeth, cord, plug, and attachment fittings. Reassemble the clipper only after every part is properly dry and positioned.
Store the equipment in a clean, dry case or drawer with its blade guard attached where applicable.
Important Safety Warning
Never immerse the motor housing, power cord, plug, or charging equipment in cleaning liquid. Only wash or soak detachable parts when their specific care instructions allow it. Stop using blades with broken teeth, severe corrosion, or other visible damage.
How Should You Clean Different Types of Dog Clippers?
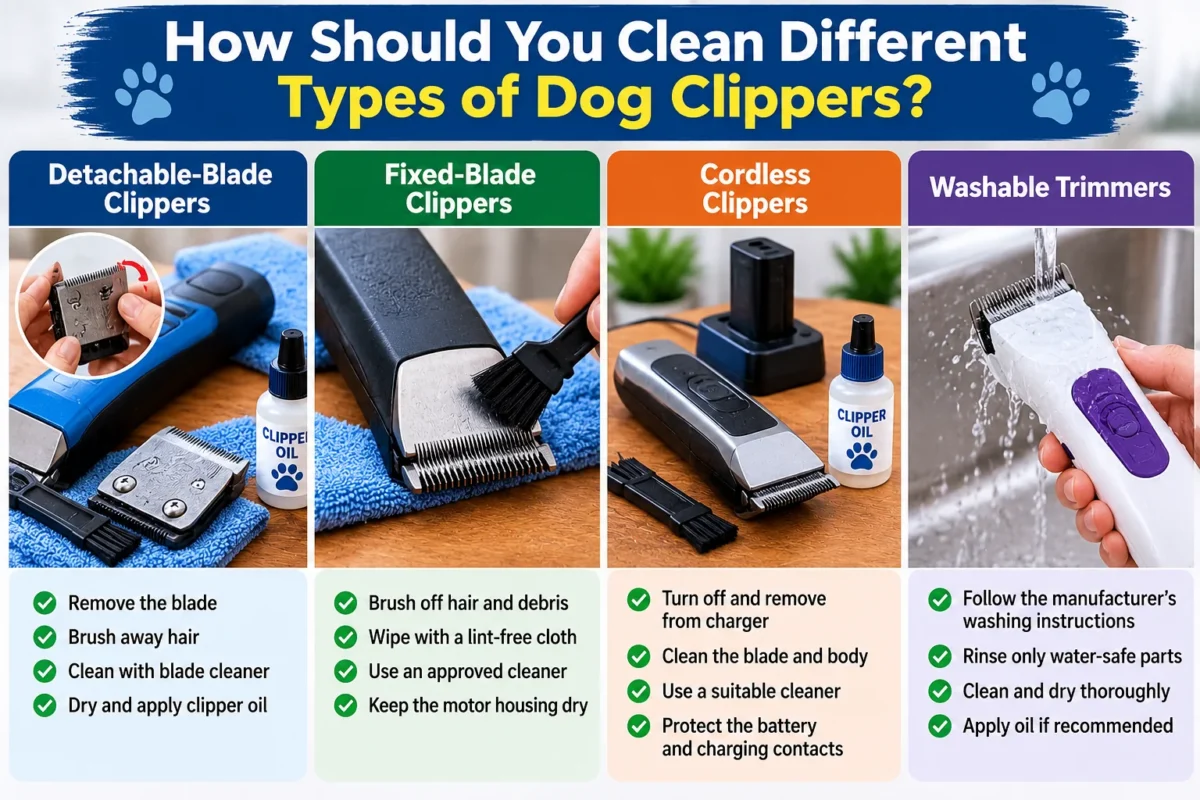
The cleaning process changes with the blade attachment system and the manufacturer’s water-resistance instructions. Not every dog clipper should be cleaned in exactly the same way.
| Clipper Type | Cleaning Approach | Important Precaution |
|---|---|---|
| Detachable-blade clipper | Remove the blade, brush it, and use approved cleaner. | Keep the motor housing dry. |
| Fixed-blade clipper | Brush and wipe accessible surfaces as directed. | Do not force blade removal. |
| Cordless clipper | Power off, disconnect the charger, and clean approved parts. | Protect battery and charging connections. |
| Washable trimmer | Follow the specified rinsing or washing procedure. | Confirm which components are water-safe. |
The blade design matters more than the brand name alone. Two models from the same manufacturer may require different cleaning methods.
For additional manufacturer guidance, see Wahl’s dog grooming tools cleaning guide, which discusses brushing, drying, disinfecting, and lubricating grooming equipment.
How Often Should You Clean Dog Clippers?
Remove hair and inspect the blades after every grooming session. More thorough cleaning depends on frequency of use, coat condition, and the manufacturer’s instructions.
- After every grooming session: Brush off hair, inspect the blade, and perform the recommended cleaning and oiling routine.
- During longer grooming sessions: Stop when hair accumulates or the blade becomes unusually warm. Clear debris and lubricate as directed.
- Between different dogs: Clean and disinfect shared blades appropriately before using them on another animal.
- Periodically: Check for corrosion, damaged teeth, loose components, or signs that professional sharpening or servicing may be necessary.
Wahl advises regular blade cleaning, with frequency adjusted to use and coat condition. For a home groomer, a simple after-use routine helps prevent buildup from sitting on the blade until the next grooming appointment.
Cleaning is easier when your dog arrives at the grooming table with a reasonably clean, dry coat. Our dog bathing guide explains gentle washing and thorough coat drying before grooming.
What Is the Difference Between Cleaning, Disinfecting, and Oiling?
These three maintenance tasks are related, but they are not interchangeable.
Cleaning removes loose hair, dirt, skin flakes, and grooming residue. It should come before chemical disinfection because visible debris can interfere with effective surface treatment.
Disinfecting involves applying a suitable disinfectant for its required contact time. A blade can appear visibly clean without having been disinfected.
Oiling lubricates moving metal surfaces. It helps manage friction and wear but does not replace cleaning or disinfection.
The most useful sequence is usually to remove debris, clean, disinfect where required, dry, and then lubricate. Always follow product-specific directions where they differ.
The Andis maintenance FAQs also emphasize blade oiling and regular sanitation as important parts of tool care.
Maintenance Tip
Keep the supplied cleaning brush and clipper oil in the same storage case as your clippers. That makes it easier to remove hair and maintain the blade immediately after grooming rather than leaving residue until the next session.
What Mistakes Should You Avoid When Cleaning Dog Clippers?
The biggest cleaning mistakes involve excess moisture, unsuitable chemicals, neglected lubrication, and careless blade handling.
- Submerging the entire clipper: Water can enter electrical or mechanical components unless the appliance is specifically designed for immersion.
- Using household cleaning chemicals without checking compatibility: Certain products may damage blade finishes, plastics, or seals.
- Applying oil over packed hair: Lubricant can trap existing debris instead of helping the blade run smoothly.
- Storing damp blades: Trapped moisture can contribute to corrosion.
- Using excessive oil: Heavy residue collects loose fur and dust.
- Disassembling unfamiliar blade mechanisms: Incorrect assembly can affect cutting alignment and performance.
- Ignoring damaged teeth: A clean but chipped blade can still catch hair or injure skin.
Do not use cooking oil as a routine substitute for clipper oil. Choose a lubricant recommended for the equipment.
Similarly, avoid attempting to sharpen the teeth using sandpaper or improvised tools. Sharpening and blade alignment require suitable equipment and expertise.
What Should You Do if Dog Clippers Still Pull Hair After Cleaning?
If clean clippers continue pulling hair, stop grooming and check lubrication, blade condition, attachment fit, and the dog’s coat before trying again.
First, inspect the cutting teeth for remaining debris. Then verify that the blade has been oiled according to the manual and is correctly attached.
If the blade is dull, misaligned, chipped, or badly corroded, cleaning cannot restore its cutting edge. Professional servicing or replacement may be necessary.
Also check the coat. Thick tangles, dirt, and dense mats can make even properly maintained clippers drag. Do not force the blade through resistant hair.
If the clipper produces unusual noise, a burning smell, electrical problems, or persistent overheating, switch it off and arrange appropriate service. Never test a visibly damaged blade against your dog’s skin.
How Should You Store Dog Clippers After Cleaning?
Store dog clippers only after the cleaned components are dry, appropriately lubricated, and correctly reassembled.
Choose a protected location away from bathrooms, wet grooming stations, and excessive humidity. Cover the blade teeth with their protective guard where provided.
A dedicated case helps prevent accidental drops and keeps guards, brushes, and maintenance supplies together.
Check the cord for damage before putting corded clippers away. Avoid wrapping it tightly around the housing because repeated bending can strain the cable.
For cordless models, follow the manufacturer’s battery-storage and charging recommendations, especially when the tool will not be used for an extended period.
Related Product
Dog Clipper Blade Oil
A suitable clipper oil helps lubricate cleaned metal blades and protect their moving surfaces. Check compatibility with your clipper before choosing one.
As an Amazon Associate, we earn from qualifying purchases.
Frequently Asked Questions
Can you clean dog clippers with water?
Only rinse components specifically approved for washing. Some removable blades or guards are washable, but many clipper housings must remain dry. Check the model instructions before introducing water.
Can you use rubbing alcohol on dog clipper blades?
Use rubbing alcohol only if the blade manufacturer permits it. Alcohol is not automatically suitable for every finish or mechanism, and using it does not guarantee appropriate disinfection without the correct product instructions and contact time.
Can you use dish soap to clean dog clippers?
Dish soap may be suitable for some washable accessories, but it should not be assumed safe for the clipper housing or metal blade assembly. A manufacturer-approved blade cleaner is the better choice for the cutting head.
Do you need to oil dog clippers after every cleaning?
Many metal clipper blades require oil after cleaning, particularly after products that remove existing lubrication. Follow your model’s oiling instructions and wipe away excess before grooming.
Why do dog clipper blades rust after cleaning?
Rust can develop when moisture remains on susceptible metal surfaces. Thorough drying, suitable lubrication, and dry storage help reduce corrosion. Replace or professionally assess blades showing significant rust.
Can you reuse dog clippers on several dogs?
Yes, provided the equipment is properly cleaned and disinfected between animals using methods compatible with the blades. Take extra precautions when skin infections or other contagious conditions are suspected.
Final Thoughts
Cleaning dog clippers does not require complicated equipment. A careful routine of brushing, approved cleaning, appropriate disinfection, complete drying, and light lubrication can keep blades in better condition between grooming sessions.
Always follow the instructions for your exact clipper model. Good maintenance helps reduce avoidable friction and buildup, but damaged or worn blades still need proper repair or replacement.
Start with one habit: clean and inspect your clipper blade immediately after every grooming session.