Quick Answer
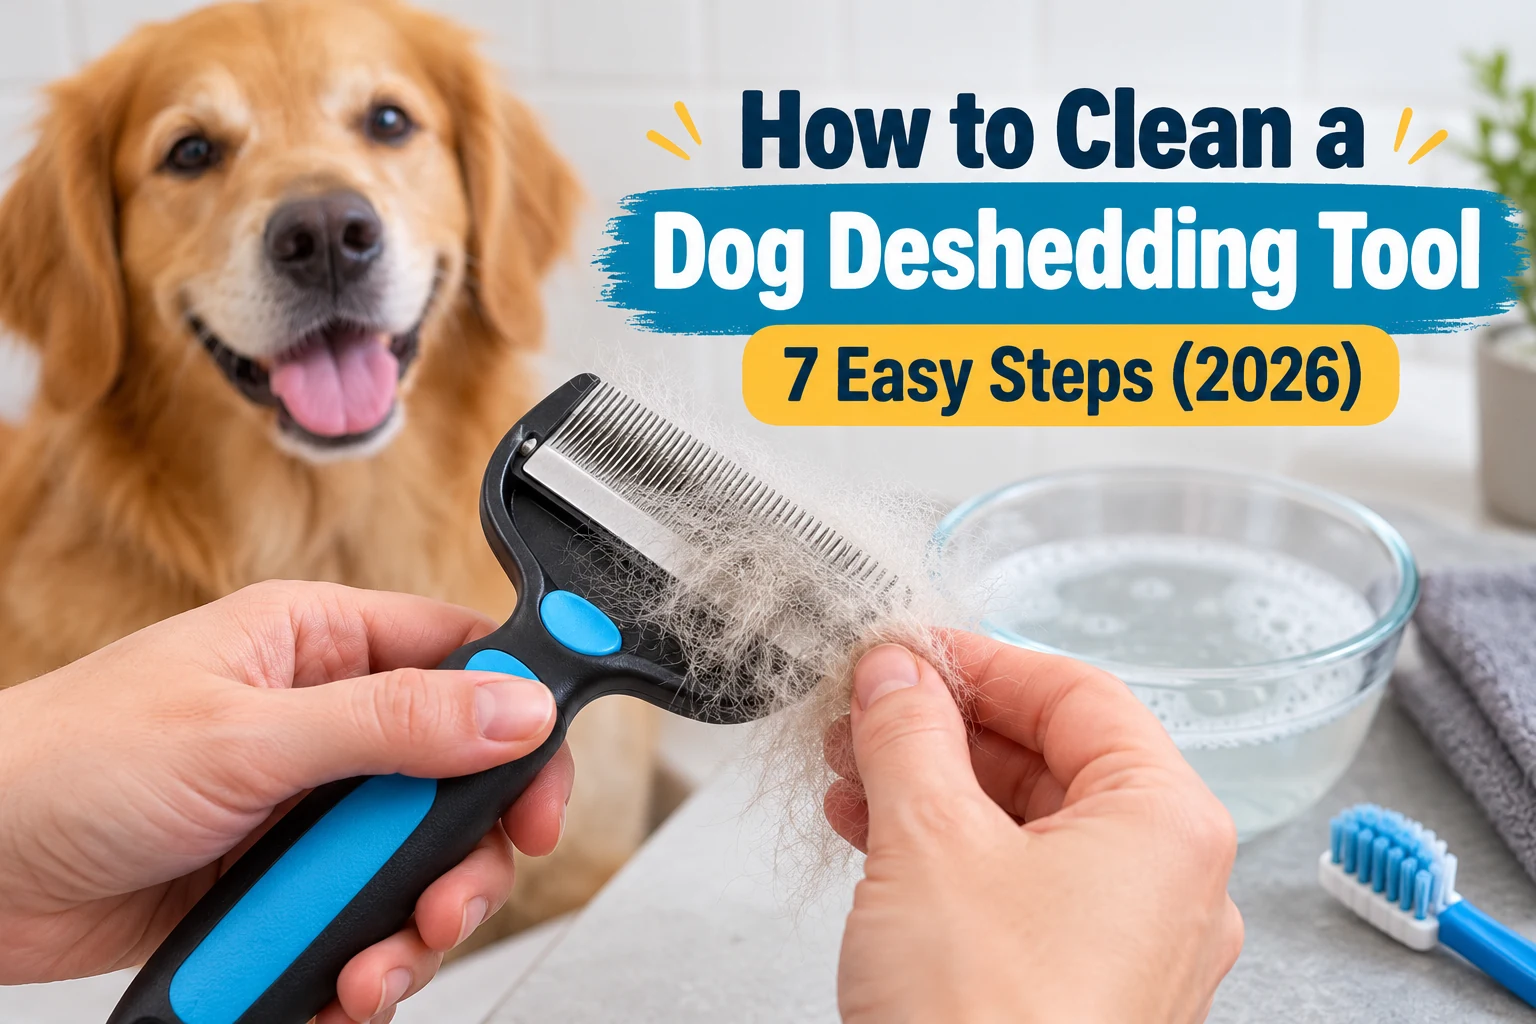
To clean a dog deshedding tool, remove trapped fur, brush debris from the teeth, and wash the washable parts with warm water and mild soap. Rinse away residue, dry the tool completely, and store it somewhere clean. Always follow your manufacturer’s instructions, especially for tools with moving parts. Regular cleaning also supports the safe grooming technique explained in this dog deshedding tool guide.
7 Easy Cleaning Steps
- Remove loose fur: Clear accumulated hair using the release button or your fingers.
- Inspect the teeth: Check for damage, rust, and stuck debris.
- Brush away buildup: Use a soft toothbrush to clean narrow spaces.
- Wash gently: Clean approved surfaces with warm water and mild soap.
- Rinse carefully: Remove soap without soaking unapproved mechanisms.
- Dry completely: Remove moisture from the metal edge and handle.
- Store safely: Protect the teeth from moisture and accidental damage.
Important Safety Tip
- Avoid harsh cleaners: Never use bleach, abrasive scrubbers, or strong disinfectants unless the manufacturer specifically approves them.
A dog deshedding tool can collect an impressive amount of loose hair. Unfortunately, that same fur often becomes trapped between the teeth and around the cleaning mechanism.
I recommend making tool cleaning part of every grooming session. This guide explains how to remove buildup, protect the metal edge, and recognize when a brush needs replacing.
Why Should You Clean Your Dog Deshedding Tool?
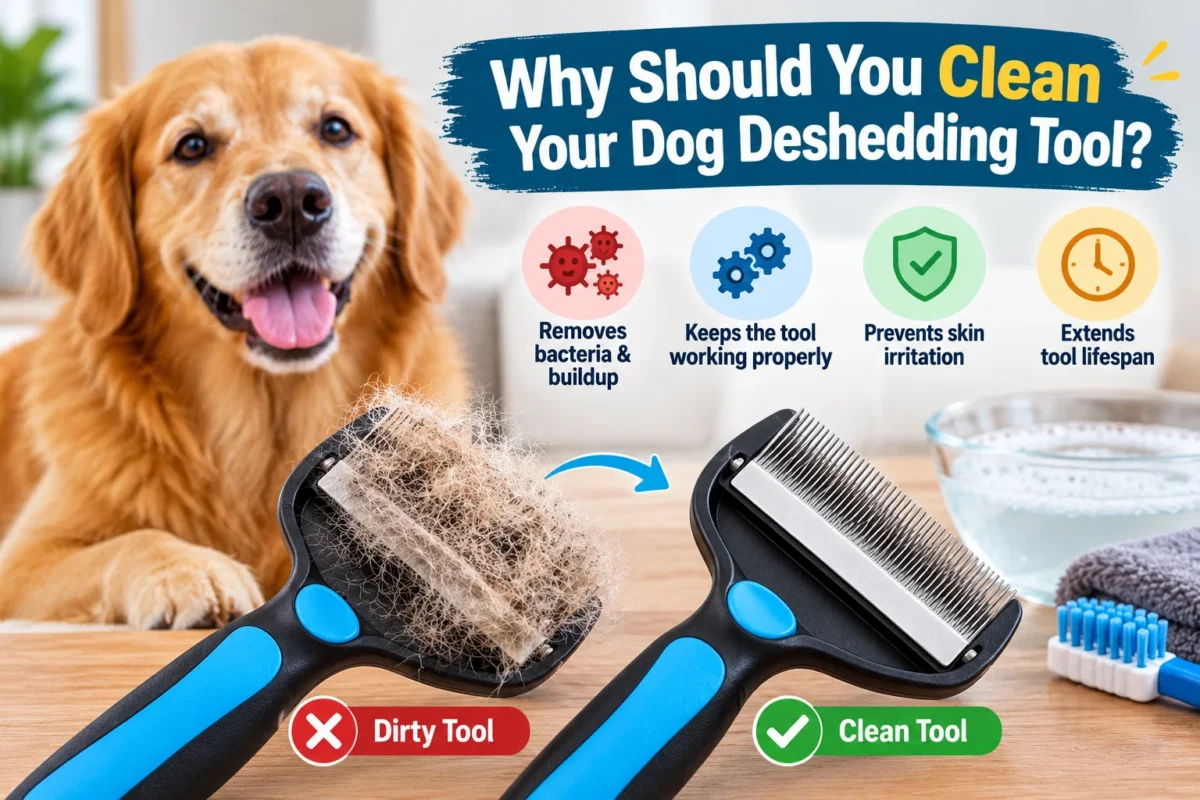
Cleaning a dog deshedding tool removes trapped fur, skin flakes, oils, and grooming-product residue. These materials can accumulate around the teeth and interfere with smooth grooming.
A clean tool is also easier to inspect for damage. That matters because bent teeth or rough edges may pull hair or irritate your dog’s skin.
What Builds Up Inside a Deshedding Brush?
Every grooming session leaves different materials behind. Even a freshly bathed dog can transfer loose hair and natural skin oils onto a brush.
- Loose undercoat: Fine shedding hairs become wedged between closely spaced metal teeth.
- Skin flakes: Dander collects near the grooming edge and handle.
- Natural oils: Coat oils can create a sticky film that holds dirt.
- Outdoor debris: Dust, pollen, and small particles may remain on the brush.
- Product residue: Grooming sprays and conditioners can accumulate on working surfaces.
Not every dirty brush looks obviously dirty. A thin layer of residue may remain after you remove the visible hair.
Can a Dirty Deshedding Tool Hurt Your Dog?
A dirty tool can snag loose hair, move less smoothly, or transfer unwanted residue onto your dog’s coat. Damage to the teeth creates an additional risk of scratching or pulling.
Cleaning alone cannot correct poor technique. Use light pressure and stop grooming whenever your dog shows discomfort.
For more guidance, review how often to use a deshedding tool safely.
What Supplies Do You Need to Clean a Deshedding Tool?
Most dog deshedding tools need only a few basic cleaning supplies. Expensive cleaning solutions are usually unnecessary for routine maintenance.
- Soft toothbrush: Loosens hair, dust, and debris around the teeth.
- Mild soap: Helps remove ordinary oils and residue from approved washable surfaces.
- Warm water: Rinses washable components without exposing them to excessive heat.
- Microfiber cloth: Wipes the handle and dries metal surfaces.
- Small comb: Helps lift stubborn hair without scraping the working edge.
- Clean towel: Provides a dry surface while the tool finishes drying.
Use a soft-bristled toothbrush rather than a wire brush. Hard metal bristles can damage protective finishes or delicate teeth.
Before adding water, confirm that your particular model permits washing. Some self-cleaning brushes contain mechanisms that should only be wiped with a damp cloth.
How Do You Clean a Dog Deshedding Tool Step by Step?
The safest approach is to remove dry debris before washing approved parts. This prevents trapped hair from interfering with cleaning.
These seven steps work as a general routine for many grooming tools. Adjust the washing method to match your manufacturer’s care instructions.
Step 1: Remove All Loose Hair From the Tool
Start by removing visible fur from the teeth and surrounding surfaces. On compatible FURminator models, press the FURejector button to release collected hair.
For tools without a release button, carefully lift the loose fur away. Avoid dragging your fingers across sharp or pointed edges.
- Hold the tool over a trash container.
- Activate the hair-release mechanism if available.
- Gently lift remaining hair with a comb or soft brush.
- Check the corners for tightly trapped strands.
Dispose of the collected fur before washing. This keeps your cleaning water and sink free of unnecessary hair.
Step 2: Inspect the Metal Teeth and Handle
Look closely at the grooming edge before introducing water. Check for bent teeth, corrosion, loose components, or cracks around the handle.
A damaged tool should not be used on your dog. Cleaning will not repair a distorted edge or broken mechanism.
- Examine the teeth under good lighting.
- Look for discoloration that may indicate rust.
- Check that the grooming head is securely attached.
- Test the release button for smooth movement.
If the tool has a missing tooth or a sharp damaged section, replace it or seek manufacturer-approved servicing. Don’t attempt to reshape precision teeth with pliers.
Step 3: Brush Away Dirt and Dander
Use a dry, soft toothbrush to remove remaining debris. Work gently along the gaps without forcing the bristles against the metal edge.
Pay particular attention to the ends of the grooming head. Hair and dust often collect where the teeth meet the surrounding frame.
- Brush along accessible spaces between the teeth.
- Clean the outer corners and hair-release bar.
- Remove loose debris from accessible handle seams.
- Wipe the surface with a dry microfiber cloth.
Don’t insert sharp objects into hidden mechanisms. If a component cannot be cleaned safely, consult the manufacturer’s instructions.
Step 4: Wash the Tool With Mild Soap and Warm Water
For washable deshedding edges, apply a small amount of mild soap with warm water. Gently clean the approved surfaces without scratching their finish.
FURminator’s official product-care FAQ permits warm water and mild soap for its deshedding edge when necessary.
- Check which parts of your model can get wet.
- Prepare warm water with a little mild soap.
- Clean accessible metal surfaces using a soft cloth or brush.
- Remove residue without applying excessive pressure.
- Keep water away from mechanisms that are not approved for washing.
Never assume a self-cleaning button makes the entire tool waterproof. Some brushes require only a damp-cloth cleaning around their moving parts.
Step 5: Rinse Away All Soap Residue
Rinse the washable areas thoroughly with clean water. Soap left between the teeth can create another layer of buildup.
Use a controlled flow of water when rinsing is permitted. Avoid spraying water forcefully into a spring, enclosed button, or handle cavity.
- Remove visible suds from the working surface.
- Check the spaces between metal teeth.
- Wipe non-rinseable components with a clean damp cloth.
- Inspect for remaining sticky residue.
If oily buildup remains, repeat gentle cleaning on the approved surfaces. Don’t increase cleaning strength by adding bleach or harsh household chemicals.
Step 6: Dry the Deshedding Tool Completely
Drying is one of the most important parts of cleaning. Moisture trapped around metal teeth or mechanisms can contribute to corrosion.
Blot the working head with a clean, lint-free cloth. Then allow the tool to air-dry completely before using or storing it.
- Absorb visible water with a microfiber cloth.
- Check for moisture around the teeth and frame.
- Allow washed components to dry in a ventilated location.
- Avoid direct high heat from a hair dryer.
- Confirm that moving parts operate normally once dry.
Don’t put a damp deshedding tool inside a sealed grooming bag. Even small amounts of trapped moisture can create maintenance problems.
Step 7: Store the Tool in a Clean, Dry Place
Store your deshedding tool where its teeth cannot rub against other metal objects. Use the manufacturer’s edge guard or protective cover when available.
A dry drawer or organized grooming kit usually works well. Keep the tool away from wet towels, spilled grooming products, and curious pets.
- Protect the metal teeth from impact.
- Keep the handle and working head dry.
- Store away from humid bathrooms when possible.
- Avoid stacking heavy equipment directly over the tool.
A simple cleaning and storage routine helps protect your equipment. It also makes the next grooming session easier to prepare.
How Do You Clean Different Types of Dog Deshedding Tools?
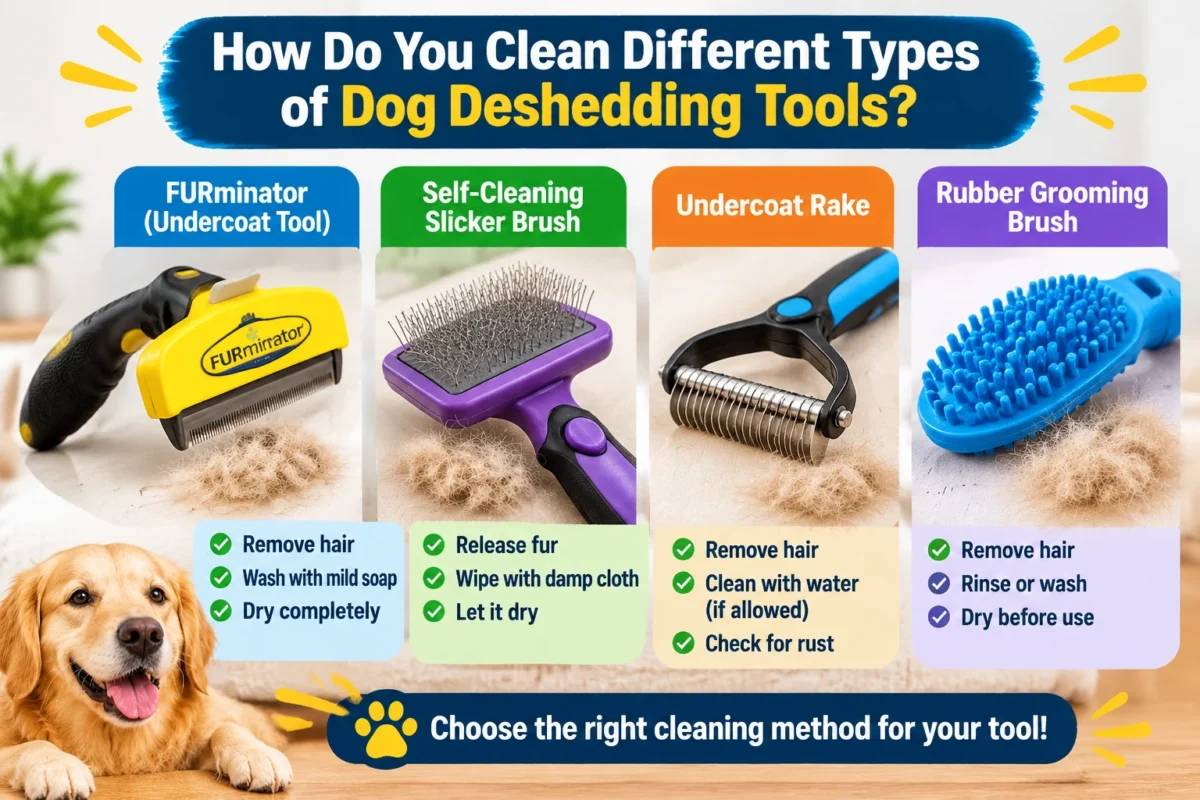
Not all deshedding brushes should be cleaned the same way. Their materials, moving parts, and grooming edges determine the safest method.
The comparison below outlines common tool types. Always prioritize instructions for your exact model.
| Tool Type | Cleaning Method | Main Precaution |
|---|---|---|
| FURminator undercoat tool | Remove hair; clean edge with warm water and mild soap as needed | Dry metal edge completely |
| Self-cleaning slicker brush | Release fur; wipe head and handle with a damp cloth | Avoid soaking enclosed mechanisms |
| Metal undercoat rake | Remove fur; wash teeth if manufacturer permits | Check teeth for rust and bending |
| Rubber grooming brush | Remove hair; wash or rinse if approved | Check material and care instructions |
How Do You Clean a FURminator Deshedding Tool?
Start by pressing the FURejector button to remove loose hair. Brush away remaining debris before cleaning the grooming edge with mild soap and warm water when needed.
Dry the tool completely and engage its edge guard for storage. Avoid bending, sharpening, or scraping the precision metal teeth.
If you’re deciding whether this design suits your dog, see the FURminator Short Hair deshedding tool review.
How Do You Clean a Self-Cleaning Slicker Brush?
Use the retractable-bristle mechanism to release trapped hair. Remove the collected fur, then wipe the brush head and handle with a slightly damp cloth.
Pay attention to manufacturer restrictions on rinsing or immersion. Allow the brush to dry before retracting its bristles for storage.
How Do You Clean an Undercoat Rake?
Pull loose hair away from the rake’s teeth and use a soft brush to clear debris. Clean with mild soap and water only when the model permits washing.
Dry the spaces around every metal tooth carefully. Inspect for rust, loose pins, or damaged tips before your next grooming session.
How Often Should You Clean a Dog Deshedding Tool?
Remove collected hair after every grooming session. Perform a more thorough cleaning whenever you notice oils, dirt, dander, or product buildup.
For many owners, a weekly inspection is a useful habit. The need for washing depends on how frequently you groom and how dirty the tool becomes.
| Maintenance Task | Suggested Timing | Purpose |
|---|---|---|
| Remove trapped hair | After every use | Prevent hair accumulation |
| Inspect working edge | Before every use | Identify damaged teeth |
| Remove stubborn buildup | Whenever needed | Clear oils and residue |
| Check mechanism and storage | Weekly or during regular use | Spot developing problems |
These timings are practical maintenance suggestions, not mandatory manufacturer schedules. A heavily used grooming tool may need more frequent attention.
What Cleaning Mistakes Can Damage a Dog Deshedding Tool?
The biggest maintenance mistakes involve excess moisture, harsh chemicals, and forceful scrubbing. These habits can damage the grooming edge or interfere with the cleaning mechanism.
Watch for these seven avoidable problems.
- Soaking the entire tool: Water may enter enclosed components that are not designed for immersion.
- Using bleach: Strong chemicals may affect finishes, grips, and other materials.
- Scrubbing with wire brushes: Abrasive cleaning can scratch or damage the working surface.
- Storing the tool wet: Remaining moisture increases corrosion risk.
- Forcing stuck buttons: Excess pressure may damage a release mechanism.
- Sharpening the teeth: Improper modifications can create unsafe edges.
- Ignoring damage: Bent teeth and loose parts may affect safe grooming.
I recommend checking the metal edge under a bright light whenever cleaning reveals something unusual. Never test a suspicious grooming edge on your dog’s skin.
Can You Disinfect a Dog Deshedding Tool?
Some dog deshedding tools can be disinfected, but the correct method depends on their materials and manufacturer instructions. Ordinary washing is not the same as disinfection.
Don’t assume household bleach, alcohol, or general-purpose disinfectants are safe for every grooming brush. Products may damage coatings, plastic parts, or enclosed mechanisms.
When Is Disinfection Necessary?
Routine home grooming usually calls for removing hair and washing approved surfaces. Disinfection becomes more important when tools are shared or potentially contaminated.
- Tools are used on more than one dog.
- A dog has a suspected contagious skin condition.
- Grooming equipment becomes contaminated by bodily fluids.
- A professional grooming environment requires infection-control procedures.
If a dog has a suspected skin infection, stop sharing its grooming equipment. Ask your veterinarian about appropriate disinfection and when grooming can safely resume.
Use only a disinfectant approved for the tool’s materials and intended use. Follow its label instructions for dilution, contact time, rinsing, and drying.
Can You Use Vinegar to Clean a Deshedding Brush?
Vinegar is not my first choice for deshedding tool maintenance. It is not a reliable substitute for a suitable disinfectant, and acidic exposure may be unsuitable for some metals or finishes.
Mild soap and warm water are generally a more sensible option when the manufacturer permits them. Don’t soak the tool in vinegar without explicit care instructions.
How Can You Prevent Rust and Keep Your Deshedding Tool Working?
Preventing rust starts with removing moisture promptly. Metal teeth and small mechanisms should be completely dry before storage.
Protecting the tool also means avoiding unnecessary impacts. Precision teeth can become damaged if the brush falls onto a hard floor.
- Dry promptly: Wipe approved washed components immediately after cleaning.
- Store separately: Prevent metal tools from striking the grooming edge.
- Use a protective guard: Engage the supplied edge cover or locking mechanism.
- Inspect regularly: Watch for corrosion, cracks, and uneven teeth.
- Prevent residue: Remove hair and oils before buildup becomes stubborn.
- Avoid unnecessary lubrication: Don’t apply household oil to the teeth or buttons unless the manufacturer recommends it.
Good maintenance can protect the working condition of a grooming tool. However, no cleaning routine can make a damaged metal edge safe again.
When Should You Replace a Dog Deshedding Tool?
Replace a deshedding tool when damage makes safe grooming uncertain. Bent teeth, sharp defects, persistent corrosion, or a faulty release mechanism are important warning signs.
Don’t judge the tool by age alone. A well-maintained brush may remain usable longer than one subjected to rough handling.
Signs Your Deshedding Tool May Need Replacing
- Bent teeth: The grooming edge no longer has an even profile.
- Visible rust: Corrosion remains on working surfaces.
- Broken components: The handle or grooming head feels loose.
- Sticking mechanism: The release button repeatedly fails to operate properly.
- Rough movement: The edge snags despite correct use and a clean coat.
- Skin discomfort: Your dog reacts painfully to an otherwise gentle grooming stroke.
Sometimes poor grooming results have nothing to do with dirt or wear. A tool may simply be unsuitable for your dog’s coat.
Learn more about matching grooming equipment to coat types in this guide to deshedding dogs.
What Should You Do if Your Deshedding Tool Still Pulls Hair After Cleaning?
If a cleaned tool still pulls hair, stop using it until you identify the cause. Check for damaged teeth, tangles, incorrect grooming pressure, or an unsuitable tool design.
Cleaning only addresses dirt and residue. It cannot resolve every cause of uncomfortable grooming.
- Inspect the working edge for damage.
- Make sure your dog’s coat is clean and completely dry.
- Remove knots with an appropriate detangling brush or comb.
- Confirm that the deshedder suits your dog’s coat type.
- Use light strokes without repeatedly scraping one area.
- Stop if the coat catches or your dog appears uncomfortable.
For more detail about selecting grooming equipment, consult the American Kennel Club and its dog grooming resources.
If repeated grooming causes redness, pain, or broken skin, stop and seek veterinary advice. The American Veterinary Medical Association provides additional pet-care resources.
Recommended Tools for Easier Deshedding and Cleaning
A suitable deshedding tool can make loose-hair removal and routine maintenance easier. I would prioritize a design that matches the dog’s coat and has an accessible cleaning surface.
These three products serve different grooming needs. The star scores below are editorial suitability estimates, not verified customer-review ratings.
Affiliate disclosure: As an Amazon Associate, we may earn from qualifying purchases.
🏆 Best for Undercoat Removal
FURminator Undercoat deShedding Tool for Dogs
★★★★☆ 4.5/5
This tool has a stainless-steel grooming edge and a FURejector button for releasing collected hair. I’d consider it for an appropriate shedding coat because its hair-release feature simplifies cleanup. Select the correct size and coat-length version.
🐕 Best for Easy Hair Release
Hertzko Self-Cleaning Slicker Brush
★★★★☆ 4.3/5
The retractable-bristle mechanism helps release gathered fur for disposal. I’d choose this style when routine brushing and quick hair removal matter more than specialized undercoat extraction. Wipe the brush as directed rather than assuming it can be submerged.
🐾 Best for Simple Maintenance
KONG ZoomGroom Dog Brush
★★★★☆ 4.4/5
This flexible rubber grooming brush collects loose surface hair without a precision metal edge. I’d consider it for many short, smooth-coated dogs and owners who want fewer narrow spaces to clean. It is not a direct substitute for every undercoat tool.
Frequently Asked Questions About Cleaning Dog Deshedding Tools
Can You Wash a Dog Deshedding Brush With Water?
Yes, some dog deshedding brushes can be washed with water. FURminator permits cleaning its deshedding edge with warm water and mild soap when necessary. However, brushes containing enclosed mechanisms may have different restrictions. Always follow the manufacturer’s washing instructions and dry approved washable components completely before storage.
Can You Put a FURminator in the Dishwasher?
Don’t put a FURminator deshedding tool in the dishwasher unless the manufacturer explicitly approves that method for your model. High temperatures, strong detergents, and extended moisture exposure may damage components. Manual cleaning with mild soap and warm water is the safer manufacturer-supported approach for the deshedding edge.
How Do You Remove Stuck Hair From a Deshedding Brush?
Start with the tool’s hair-release button if it has one. Carefully lift remaining strands with your fingers, a small comb, or a soft toothbrush. Avoid scraping between the teeth with knives or other sharp objects. Inspect the brush for damaged teeth if hair repeatedly becomes difficult to remove.
How Often Should You Wash a FURminator Tool?
Remove loose hair after every grooming session, but wash the FURminator deshedding edge when visible dirt, oils, or residue require it. The manufacturer’s guidance supports cleaning with warm water and mild soap as needed. There is no need to assume the tool requires a complete wash after every use.
Can You Use Rubbing Alcohol to Clean a Dog Deshedding Tool?
Don’t routinely use rubbing alcohol unless the manufacturer confirms compatibility with your tool. Alcohol may affect certain plastics, rubber grips, finishes, or mechanisms. For ordinary buildup, mild soap and warm water are more appropriate when approved. For disinfection, follow manufacturer and veterinary guidance rather than improvising a cleaning solution.
Final Takeaway: Keep Your Dog Deshedding Tool Clean and Safe
Learning how to clean a dog deshedding tool is a simple way to support safer, more comfortable grooming. Remove trapped hair after every session, clean buildup when needed, and keep the working edge dry and protected.
Remember that cleaning cannot fix damaged teeth or the wrong tool choice. Regular inspection, gentle grooming, and proper storage matter just as much as washing.
For more coat-care information, explore the double-coat deshedding guide and build a routine that suits your dog’s coat.